How to set up Dlinkap.local 1620 in a home network through the web browser?
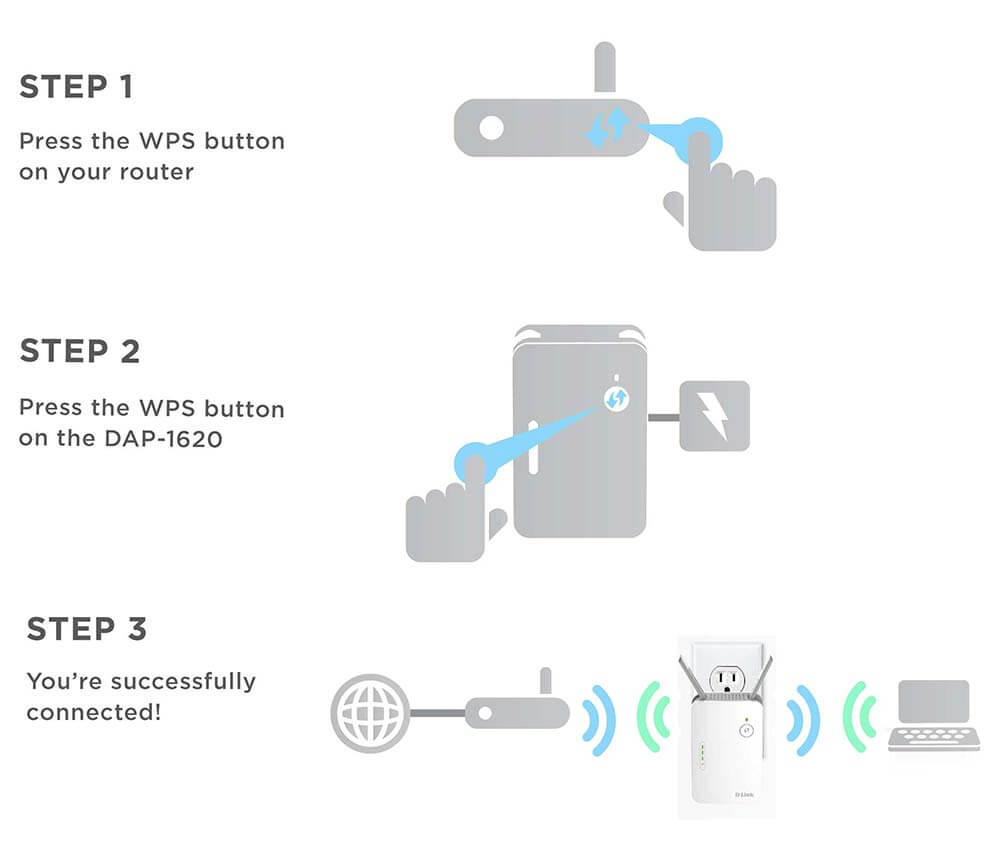
Dlink dap 1620 setup : The most convenient method of connecting a Dlink extender to your main router is through the WPS connection method, which most of the users utilize to perform the setup process. Though WPS connection is a convenient method still users use the web browser method as it is more reliable and suitable than the WPS connection method. Once your range extender gets successfully connected to the router, you can perform the configuration process either through the dlinkap.local window or through your mobile device using the Dlink Wi-fi app.
d’link dap 1610 setup through dlinkap.local
- Connect the extender to your computer via a wired connection or through Wi-Fi.
- If you are choosing a Wi-Fi connection, you can find the default Network Name of your Extender on the Wi-Fi list of your computer.
- You can find the default Network Name and Wi-Fi password of your Dlink 1620 extender on the product label of your device which will probably be on the back of your device.
- As soon as you get connected, open a browser and type dlinkap.local on the address bar of your browser to open a management page of your extender. If you fail to connect, you can also type the LAN IP address of your extender on the address bar of your browser.
- Now, create a log-in password for your Dlink 1620 Extender and re-type it on the Confirm Password field. Make sure that you are fulfilling the criteria of the login password of the Dlink Extender login window.
- Click on the Start button to start the setup process of your Dlink 1620 Extender.
- When you click the Start button, your device starts searching for the available nearby Wi-Fi network.
- When the scan process gets completed, the management gives the list of nearby available Wi-Fi networks from which you have to choose the 2.4 GHz network of your extender.
- Now, create a Wi-Fi password for your extender network and click on the Next button.
- Repeat the above step for the 5 GHz network and click on the Next button.
- You will be redirected to the Wireless settings page of your network from where you can create any changes on your Wireless network.
- Note: Select the “Hide SSID broadcast” option if you don’t want nearby users to access your network.
- Next is the Summary page from which you can review all the settings you configured. Double-check all the settings performed in the configuration process of the Dlink 1620 Extender.
- Click on the Save button when you are done reviewing the settings of your device. The extender will immediately start the reboot process to apply the settings your configured.
Note: Users who want to perform the Dlink extender setup process through the web browser have to interact with the dlinkap.local window. A user can use the dlinkap.local as the URL of the browser or can use the LAN IP address of a Dlink 1620 extender to interact with the web management of the range extender. The IP address of a Dlink 1620 range extender is 192.168.0.50
change login password for dap 1620 extender
The login password is one of the important credentials of the Dlink extender login window that allows a user to log in to the dlinkap.local window. Any user who wants to change the configuration of the Dlink 1620 extender should have the login password to type in the password field of the login window. A user can also keep the default password as an actual login password of the Dlink extender login window. You can change the login password after the configuration process anytime using the dlinkap.local window.
Steps to change the login password of the Dlink 1620 range extender
- Open a browser on your computer or laptop to which the local network is connected.
- Go to the address bar of your browser and type dlinkap.local on the address bar of your browser. In case you encounter an error, type the LAN IP address of your extender as the URL of your browser. The LAN IP address of a Dlink 1320 range extender is 192.168.0.50
- Hit the enter button and you will be redirected to the Dlink Extender login window.
- Type down the login credentials within the respective login fields. Type “admin” as the default username and mention the password you typed earlier while logging into the dlinkap.local window. Both the credential fields are case-sensitive.
- Click on the login button and the web setup page of dlinkap.local appears on your screen.
- Go to the Management tab, select the System Admin option.
- As soon as you click on the System Admin option, the System Admin page appears on the screen.
- Take your cursor to the Admin Password section and change the login password by removing the current password and typing the desired password you want to keep for the Dlink extender login window.
- Retype the password on the Confirm Password field and make sure to hold the shift key when you want to type an uppercase letter and release the key when you want to type a lowercase letter.
- Click on the Save button when you are done configuring the login password of the Dlink 1620 range extender.
Note: Both the credentials of the Dlink extender login window are case-sensitive. Be careful while mentioning the credentials, any fault while mentioning the credentials can bring failure in the access of the dlinkap.local window.